![vali logo_FINAL-2-08-2.png]](https://support.valicyber.com/hs-fs/hubfs/vali%20logo_FINAL-2-08-2.png?height=40&name=vali%20logo_FINAL-2-08-2.png)
For ZeroLock Management Console versions before v5, please use this link.
Overview
An Endpoint Profile greatly simplifies ensuring that the desired protections are enabled/disabled, the Lockdown rule policies, the logging and cache options, and the secure shell configuration are as you intended for that specific endpoint.
Additionally, using Endpoint Profiles enables ZMC administrators to fine-tune settings for Ransomware, Cryptojacking, and Tampering protection, and settings for ensuring CLI-MFA two-factor authentication usage. These profiles can also be configured to manage HASH rules for setting alert levels, response type, whether to send email alerts, and auto-quarantine settings.
The following instructions will walk you through the layout of the Endpoint Profiles homepage, followed by instructions on creating an Endpoint Profile.
Endpoint Profile Screen
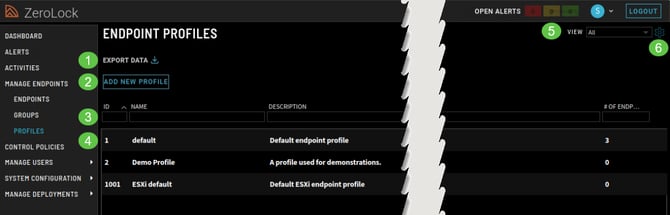
- Export Data
 - Allows downloading all the information on your screen in CSV format. Clicking either will download all the information on your screen in CSV format.
- If you wish to see only select files, hover the cursor to the left of the file number and select the box that appears.
- Once you have selected the files you want, use either download option.
- Add New Profile - Select this when creating a new endpoint profile.
- Column Headings - The column headings are mostly self-explanatory. IDs are system-generated. “# of Endpoints” refers to the number of endpoints that the profile is being used by.
- Profiles - The names and descriptions of endpoint profiles existing in the environment.
- View - Provides a drop-down list of the screen configurations, i.e., layouts or views available. Initially, the only option in the VIEW drop-down list is All, representing the default and the only available layout or view. Once other layouts are created, they will appear on the list.
- Edit - Selecting the cog or gear symbol
 brings up the Edit View pop-up screen. This screen enables changing the layout (view) of the columns, such as moving columns or hiding columns altogether. The views you create may be saved under their name for easy access from the VIEW tab.
When the Edit View screen first appears, the default name ‘All’ is visible, and Save A Copy is the option.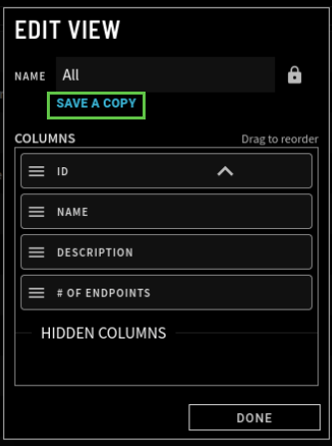
Selecting SAVE A COPY will bring up the Save View As modal, where a name for the view is entered. Selecting the Save As button confirms the creation of the view.
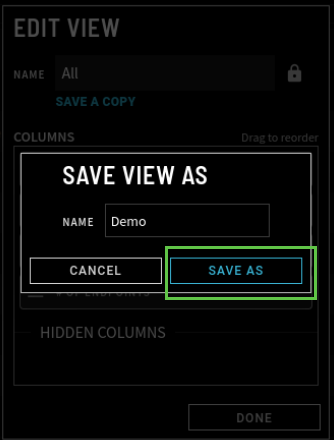
Moving any column will replace SAVE A COPY with MODIFIED, RESET, and SAVE AS.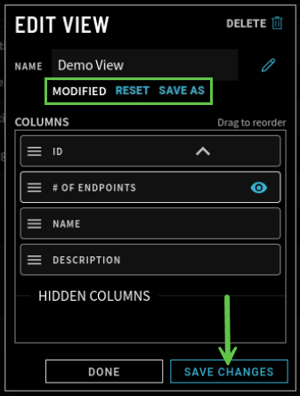
- Modified – is static and only shows that the ‘original’ layout (view) has been changed. The label goes away when it’s saved.
- Reset – erases your changes, returning the profile to its original configuration.
- Save As – allows you to name and save the view you created.
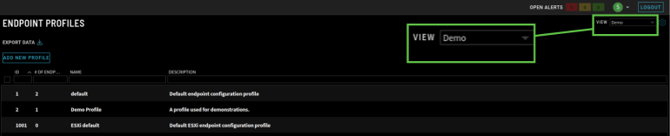
In Demo View, the '# of Endpoints' was moved below the ID column. To save your changes to the current view, select SAVE CHANGES.
However, to save this as a new View, click SAVE AS, then enter a name for the new view in the Save View As modal. Lastly, selecting Save As will complete the naming of the new view and return you to the Edit View screen.
To save your changes to the current view, select SAVE CHANGES.
Clicking the Done button completes the process and opens the new Endpoint Profile View or layout.