Enabling SSO in the ZeroLock® Environment using Microsoft Entra ID_v4.1.x
This article will walk through configuring a ZeroLock Environment for Single Sign On (SSO) using Microsoft Entra ID, formerly Active Directory, a cloud-based identity and access management service.
To create and configure an application for the ZeroLock Management Console (ZMC) in Microsoft Entra use the following steps.
Create an Application
- Login to the Microsoft Entra admin center using your company’s credentials and go to Applications | Enterprise Applications | New application.

- Click on Create your own application.

- Name the application. For this example, it is ZeroLock Management Console, and select the 3rd button down - Integrate any other application you don’t find in the gallery (Non-gallery). Then click the Create button.

Configuring for Single Sign-On
- Under the Manage section, select Single sign-on.

- On the next screen, select SAML as the single sign-on method.

- Under Set up Single Sign-On with SAML click edit on Section 1 - Basic SAML Configuration.

- Add the Identifier and the Reply URL. These can be found in the Service Provider Config section on the System Settings page of the ZeroLock Management Console.

- Once the Identifier and Reply URL have been added, select Save at the top of the page.

- Returning to the Set up Single Sign-On with SAML page, go to Section 3 – SAML Certificates and download the Base64 Certificate. The certificate will be imported into the ZeroLock Management Console.

- In Section 4 – Set up ZeroLock Management Console, enter the requested URLs which may be found in the Identity Provider Config section under System Settings in ZeroLock Management Console.


- Click Select File for CERTIFICATE and point it to the downloaded certificate from step 6. Then click Update.

Adding Users
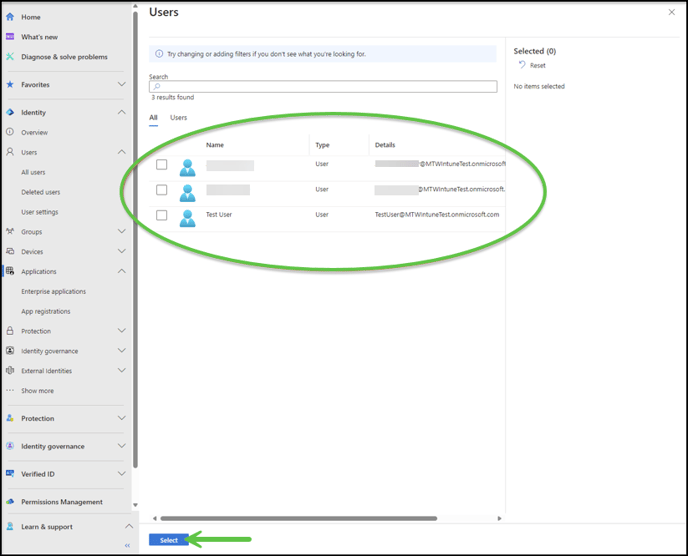
You will need to select the users in Entra that you wish to have access to SSO for the ZeroLock Management Console application.
Under the ZMC application you added previously, Users section, select the Users that are to have SSO access. Once the Users have been selected, click Select at the bottom of the screen.
Configuring the ZeroLock Management Console
If using a locally hosted environment and NOT the Vali Cyber hosted SaaS environment, the domain name for your Entra users is to be entered in the Tenants section. The following section will take you through that process. For the Vali Cyber-hosted SaaS environment contact Vali Cyber to have the Support Team will enter the domain name.
- In ZeroLock Management Console (ZMC) go to Manage Users | Tenants and select the tenant for which you wish to enable SSO.

- Double-clicking anywhere on the Tenant line will open the Edit Tenant screen. Once there, fill in the domain name with the domain for your Entra users (For example: if the email address is user@mydomain.com then the domain name would be mydomain.com). Click the Edit Tenant button to save changes.

- For users that are to use SSO, when creating a new user or modifying an existing user, switch the SSO Account dropdown to YES. Lastly, select Update.

- When logging into ZeroLock Management Console with this user, you should see the Entra login screen. When you log in with an SSO user, if an account has not already been created, the ZMC will create an account for you.

Congratulations, you have successfully configured SSO for the ZeroLock Management Console.