![vali logo_FINAL-2-08-2.png]](https://support.valicyber.com/hs-fs/hubfs/vali%20logo_FINAL-2-08-2.png?height=40&name=vali%20logo_FINAL-2-08-2.png)
For ZeroLock Management Console versions before v5.1.x, please use this link.
NOTE: The settings contained are only supported on ZeroLock Agents v3.x or later.
The ZeroLock Agent (ZA) supports the following ESXi versions:
|
ESXi 6.7 |
ESXi 7.x |
ESXi 8.x |
|
ESXi670-202102001 (Build -17499825 or higher, eff. 02/23/2023) |
All Versions |
All Versions |
Installing ZeroLock via Command Line Using the Signed Component Installer
Installing the ZeroLock Agent via the command line on an ESXi host using the signed component installer ensures a secure, policy-compliant deployment — even in environments where vCenter is not available. Here's why this is the preferred method for standalone or scripted installations:
- No Acceptance Level Changes Required:
The signed component is trusted under the default PartnerSupported acceptance level, eliminating the need to lower the host’s security posture to install the agent. - Maintains Component Integrity:
The installer is digitally signed to ensure it hasn't been modified, assuring that the deployed package is authentic and tamper-free. - CLI-Friendly Deployment:
Ideal for edge, lab, or air-gapped environments, the signed installer can be deployed using standard esxcli commands without requiring vCenter or GUI interaction. - Compatible with Future vCenter Integration:
Even when installed manually, using the signed version allows for future upgrades or management through vSphere Lifecycle Manager (vLCM) should the host later be added to a managed cluster. - Clear Installation Logging and Auditability:
Because the package is signed and validated, the installation is logged cleanly within the ESXi host, supporting audit requirements and change tracking in enterprise environments.
Together, these benefits make the signed command-line installer a secure, efficient, and forward-compatible option for installing ZeroLock on ESXi hosts outside of vCenter-managed infrastructure.
Managed Deployments
Before installing any ZeroLock® agent, it is important to configure specific settings, regardless of the installation method. These settings may differ based on the deployment environment and the version of the agent being installed.
- Go to Manage Deployments > Collectors and verify that a collector is in place. Collectors are responsible for receiving activity and alert data from endpoints before it is stored or forwarded.
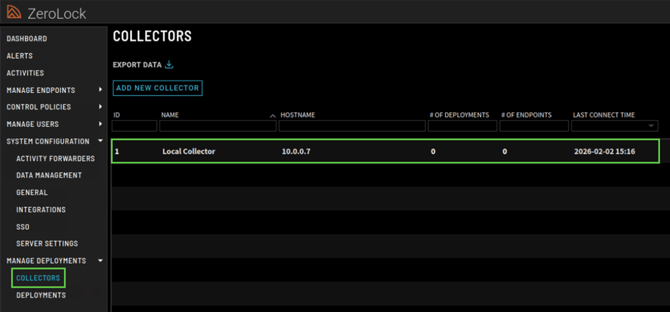

- The collector hostname or IP address is the same system where the ZeroLock Management Console (ZMC) is running. In other words, endpoints send their data directly to the ZMC.
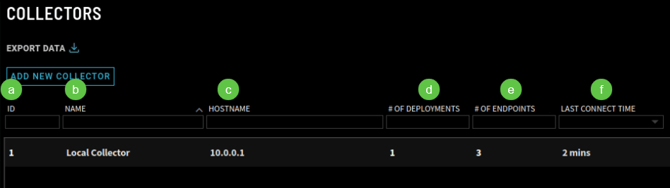
Each collector entry shows:- ID: The number of the collector instance.
- Name: A descriptive label for the collector.
- Hostname: The IP address or hostname of the ZMC.
- Deployments #: The number of deployments using the collector.
- Endpoint #: The number of endpoints assigned to the collector.
- Last Connect Time: The time since the most recent connection.
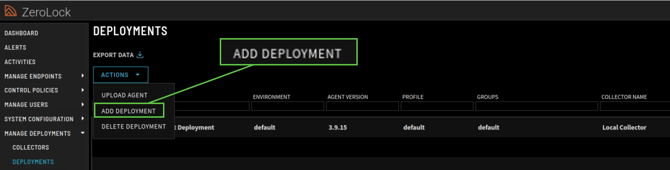
- Next, select DEPLOYMENTS. From the Actions dropdown menu, select Add Deployment.
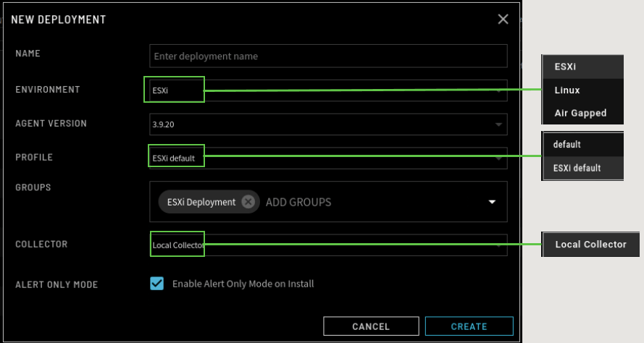
- On the New Deployment modal, enter a name for the deployment, then, depending on the network configuration, choose the Environment type: default (Linux), ESXi, or Air Gapped.
-
Select CREATE to complete the new Deployment creation.
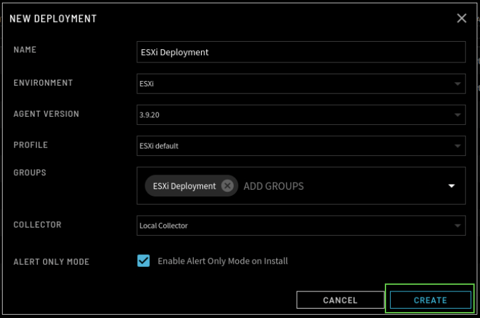
- On selecting CREATE, you will be presented with the following screen.
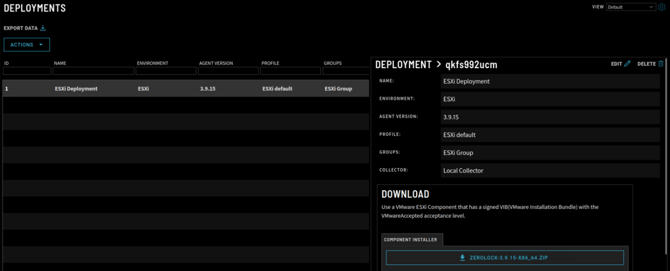
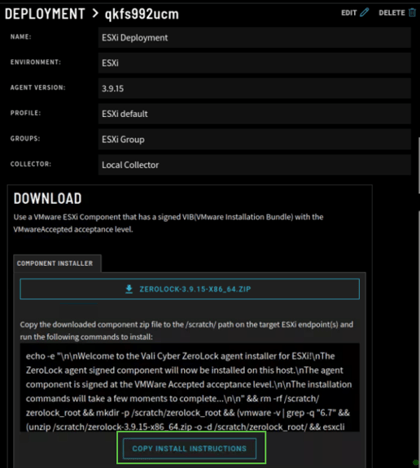
- On the Deployment screen, under the Component Installer tab, select Copy Install Instructions to save the command to the clipboard.
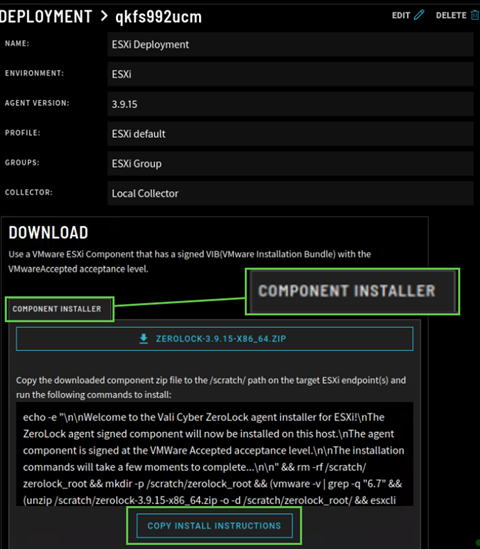
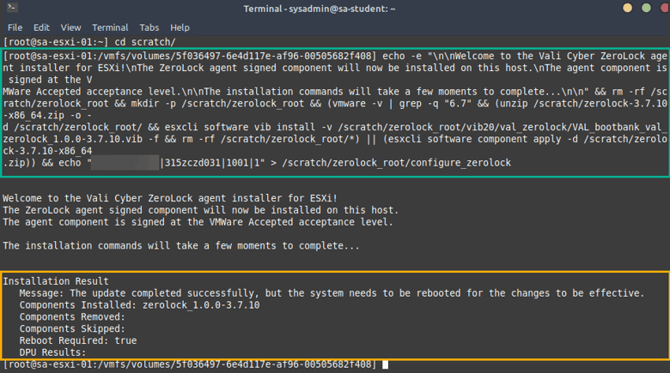
- Copy the downloaded ZeroLock Agent file (zerolock-#.#.#-x86_64.zip) to the ESXi host’s scratch folder (e.g., scratch/). Then, open a terminal, SSH to the client, and paste the copied script into the terminal. Run the installer with root privileges. This may take a few minutes.

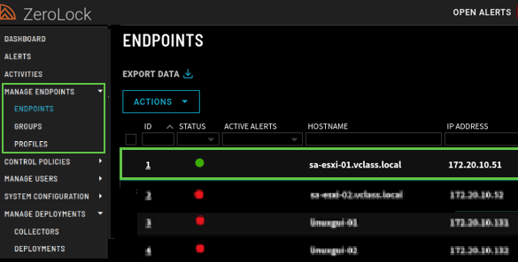
- In the ZMC, go to Manage Endpoints > Endpoints and confirm that the agent installation on the endpoint was successful. The newly added endpoint should appear in the list, and a green status indicator confirms that the agent is installed and actively connected to the ZeroLock Management Console.

Component Installer Installation
- Place the ESXi Host in Maintenance Mode:
Verify the ESXi host is placed in Maintenance Mode before beginning the installation. Once the host is successfully in Maintenance Mode, you can proceed to Step 2. - Download and Copy the Component Installer:
After completing the System Configuration section and returning to the Deployments home screen, notice the Download section. The Download section contains the package that includes the ZeroLock Agent component, which has been certified by Broadcom to ensure compatibility and performance within VMware-supported environments. Select and download the Component Installer.zip file.
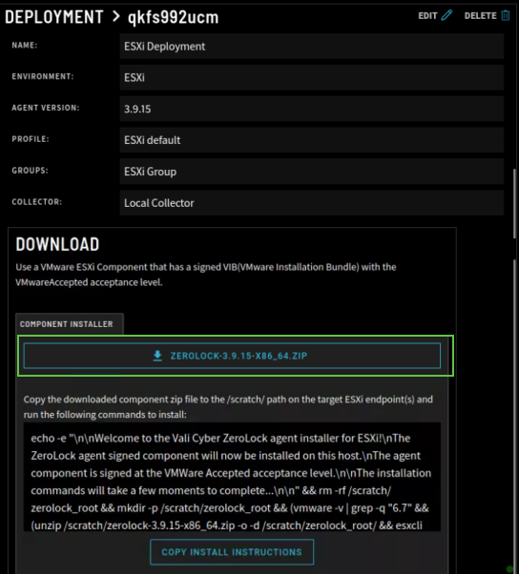
- Click Copy Install Instructions to copy the installation command.
- Run the Installation Command
Copy the signed ZeroLock component to the ESXi host’s scratch folder (e.g., scratch/). Then, in a terminal session on the target system, run the copied installation command or script to begin the installation. Once the installation is complete, a reboot of the ESXi host is required to activate the ZeroLock Agent.

Validating Agent Installation
To validate a successful installation, follow the instructions provided in the Validating Agent Installation link. Additionally, ensure the ESXi host has been rebooted and that the ZeroLock Agent is running as expected.
To perform additional checks and confirm that the ZeroLock VIB package was installed correctly, you’ll need to temporarily deactivate endpoint protection in the ZeroLock Management Console (ZMC).
Skipping the deactivation step may cause the ZMC to interpret your verification commands as tampering, which could result in your SSH session being automatically terminated.
- In the ZMC console, navigate to Manage Endpoints > Endpoints and select the endpoint to verify that the ZeroLock VIB was installed correctly.
- Click the Actions drop-down menu and click Deactivate Endpoint Protection.
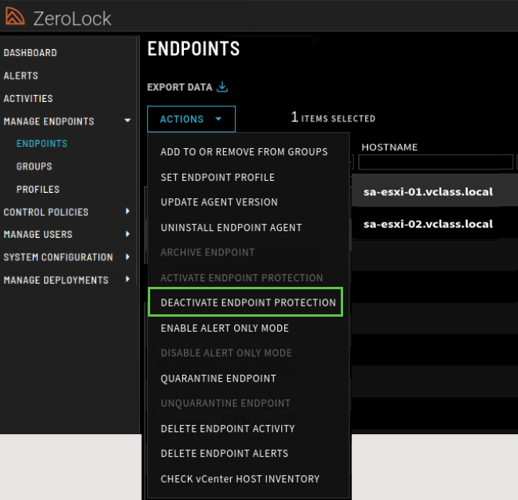
- Verify that endpoint protection has been successfully turned off in the ZMC. The status of the endpoint will change to yellow, indicating that protection is currently deactivated.
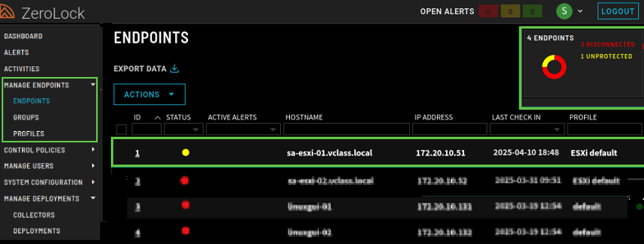
- Once the endpoint is deactivated, verify the installed ZeroLock VIB package, run the following command on the ESXi host: esxcli software vib get -n val_zerolock
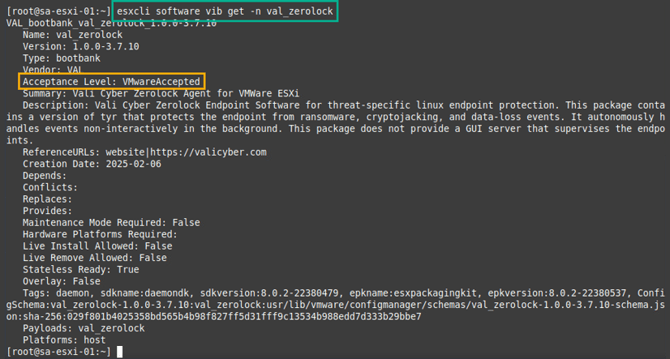

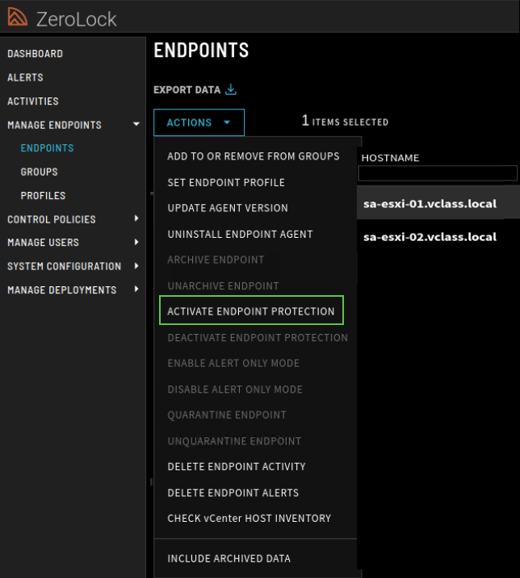
- Click the Actions drop-down menu and click Activate Endpoint Protection.
View ZeroLock Agent Logs on ESXi host
There are two primary components of the ZeroLock Agent: Tyr and Baldur.
- Tyr handles communication with the ZeroLock Management Console (ZMC).
- Baldur functions as the behavior analysis engine, responsible for detection, response, and telemetry, which it reports back to Tyr.
The output from relevant ZeroLock components is now consolidated into a single log file, val_zerolock.log, which is in the /var/log directory on the ESXi host.
To view and verify val_zerolock.log, enter the command below in the terminal window:
- ls -l /scratch/log | grep val_zerolock

For more information, please visit the Vali Cyber Support page.