
This article walks through manually adding a ZeroLock Agent to the ZeroLock Management Console.
In the following example, Agent version '3.5.16' is being added to the ZeroLock Management Console (ZMC).
- Download the new ZeroLock Agent file from the support site.
- Copy the downloaded file to the ZeroLock Management Console.
- Unzip the ZeroLock Agent tar file: tar xzvf zerolockagent_<version number>_cpkg.tgz
Command: tar xzvf zerolockagent-3.5.16_cpkg.tgz

- Change to the newly created bin folder.
- Copy all contents from the bin folder to the ~/zerolock-server/database/assets folder.

- Lastly, we need to update the sha512 file to contain the information for the new agent build.
- Change to the assets folder: cd ~/zerolock-server/database/assets
- Append to the file: cat checksums-<version number>.sha512 >> checksums.sha512
Command: cat checksums-3.5.16.sha512 >> checksums.sha512
- Verify that the imported ZeroLock agent installation files are available:
- Navigate to the Deploy page on the ZMC.
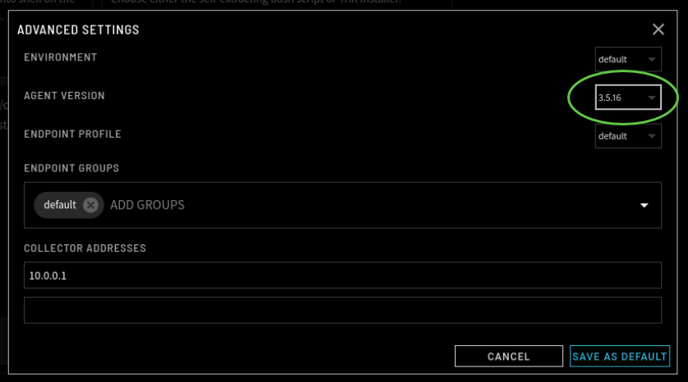
- Click on the Advanced Settings link.
- The new ZeroLock Agent version will be displayed in the Agent drop-down.

Using the ZMC, you can now upgrade your endpoints with the new ZeroLock Agent version using the following methods:
ESXi
- ESXi ZeroLock® Agent Deployment Guide: Signed Component Command-Line Installer
- Implementing the ZeroLock® Agent Using a Baseline Component
Linux